Boxwood – Buxus
Boxwood
Year 2001!!!!
I receive a phone call from a friend at 11.30 p.m.: "Francesco, a friend of mine is having his garden bulldozed. There are some big boxwoods, shall we go and have a look? We have to do it right now, or, tomorrow morning there will be nothing left!"
I guess my friend is indulging in hyperboles, nevertheless if in doubt, don’t! Made the car in seconds flat, made my way to the garden.
Sure enough, my friend was right. Before my eyes there is an incredible amount of boxwood logs, lots, lots, lots of boxwood!!!
Unfortunately, the excavator did its work pretty accurately and many of these logs were completely broken or with no roots.
Using a flashlight, we manage to find some boxwoods with roots.
The plants are big... old... and heavy!
We do what we can and hope for the best while re-potting ...At 4 a.m. we're done!!!! Our boxwoods are all in pots.
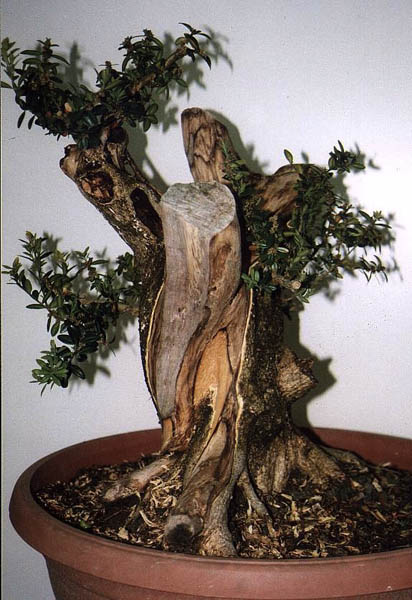
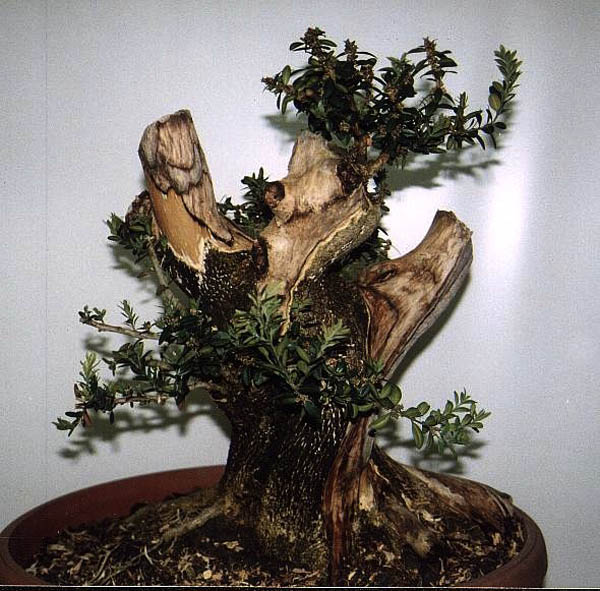
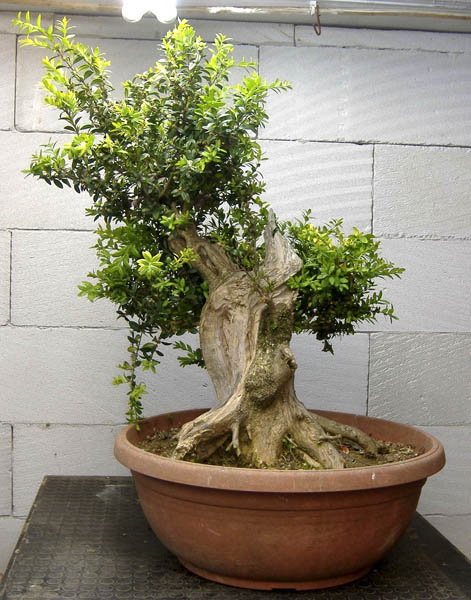
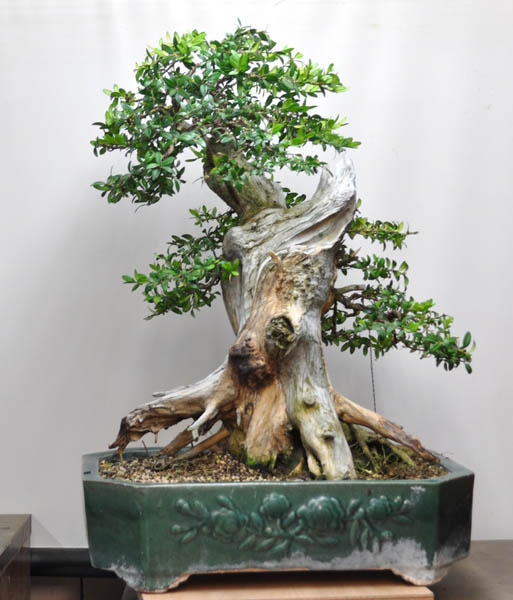
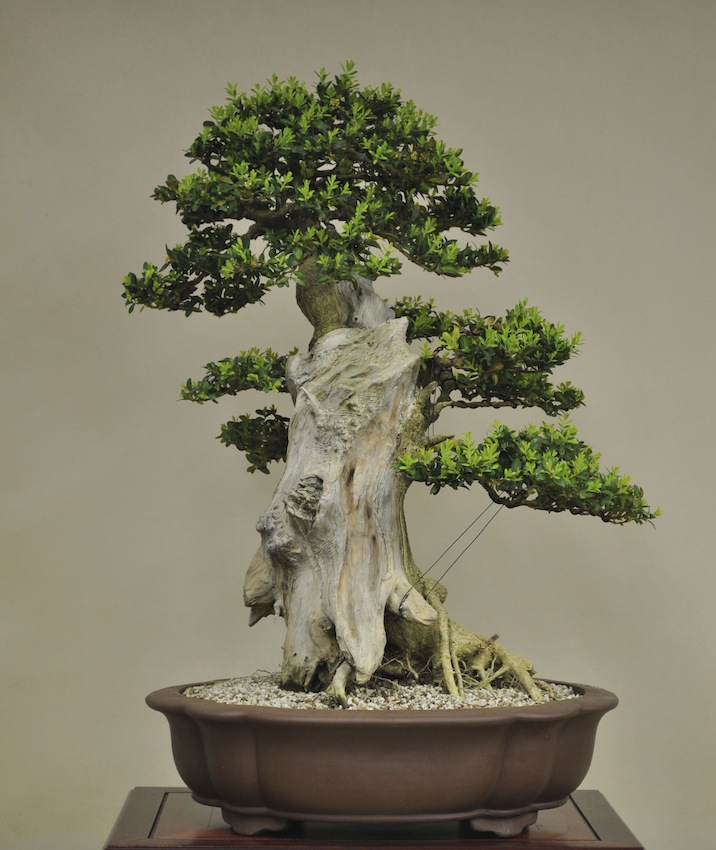
Among them, there was a heavyweight one ... here it is!!!! I called it the boxwood "chisel-slayer": you can figure it out why!!!!!
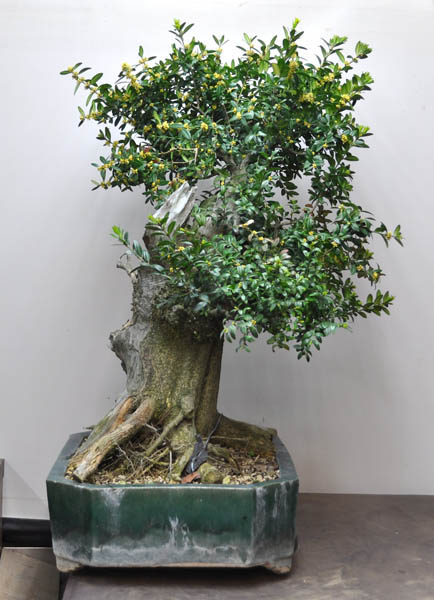
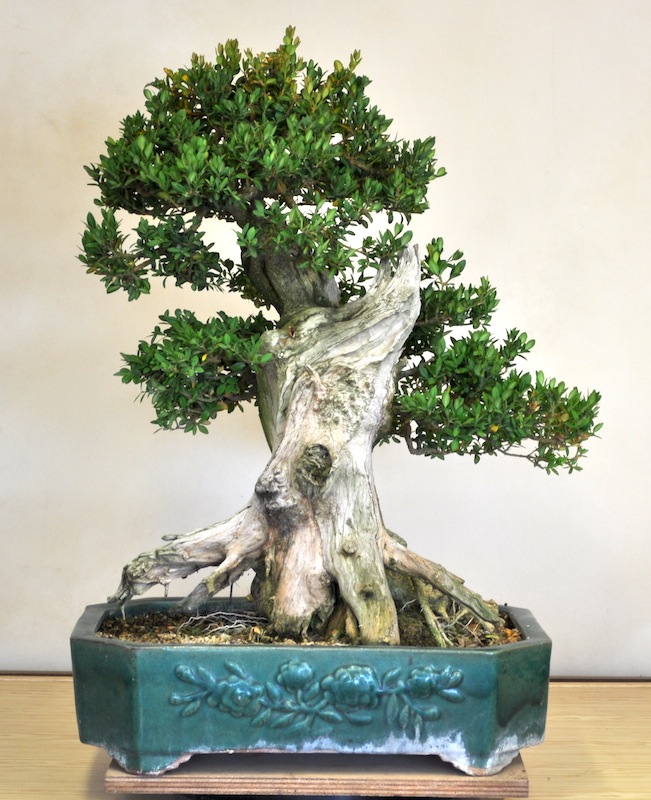
The first photos date back to 2003 when roots were already pretty well developed!
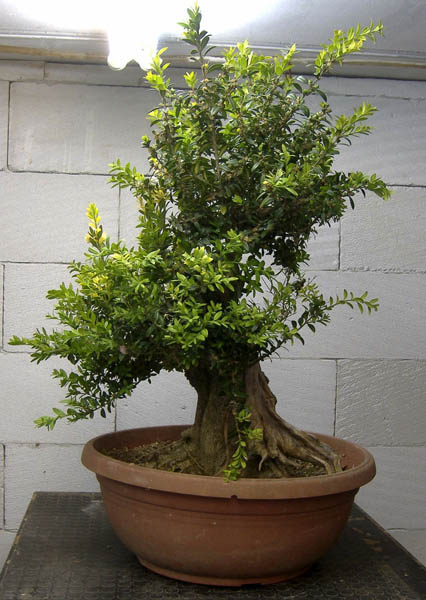
In the first stage of cultivation, my focus was on the swelling of the branches. Boxwood tends to make many buds concentrated in a few places. If you do not select the branches and twigs you will have young and herbaceous branches only. So, it is better to leave a few of them, well distributed along the trunk, and let the buds begin to swell and then lignify. Let them grow freely, cultivated in the sun and with a close eye on a proper, generous fertilization. The outcome is easily predictable.
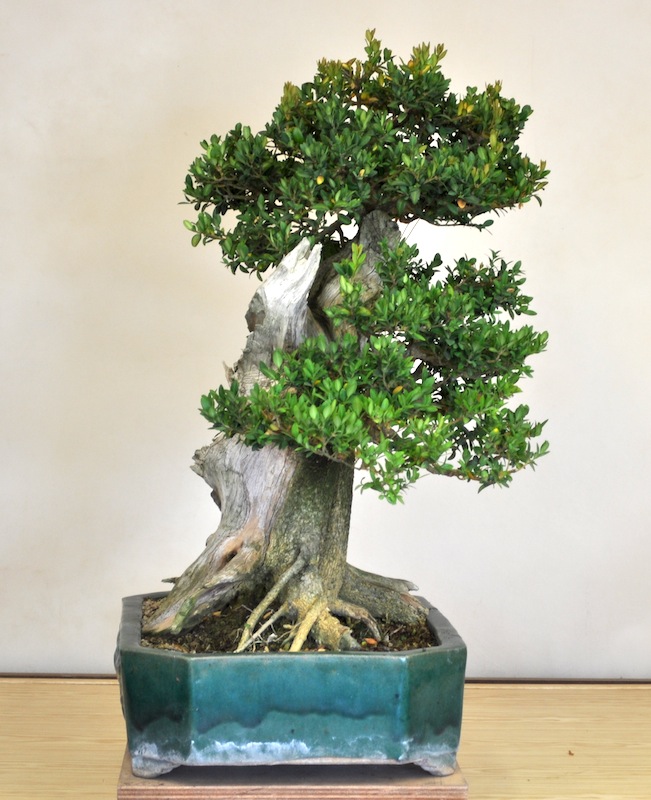
Given the consistency of the boxwood, it would be better to prune young branches according to the design. I strongly recommend here to use anodized aluminium wire, wrapping the branches loosely. It will be especially useful to lower the initial section of the branch before it becomes too hard to bend!
The presence of the wire on the trunk did not allow me to work the wood. I had to wait until branches reach an adequate diameter, so that I can use the chisels!...and this is where the name of this plant comes from!!!
Boxwood, you know, is very hard and compact. It tends to be somewhat difficult to work with and it has a slight blunting effect on cutters, so the best way to split our chisels is to let them get into the wood with an hammer blow and then delude ourselves that we are leveraging them to lift the xylem cells or phloem sieve tube elements...huge mistake!!!
With boxwood you have to be extremely meticulous.
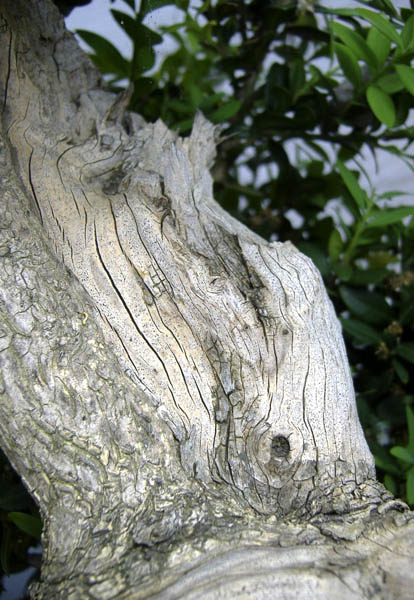
If, like me, you don't like working with an electric milling machine at all, the first step is to use a splitter. Once it gets into the wood, the latter is easily divided. Best not to overdo, so proceed cautiously, in small steps!
Once the volume of wood has been reduced, it is time to go deeper into it with chisels. The same basic rule, i.e. caution, applies here too.
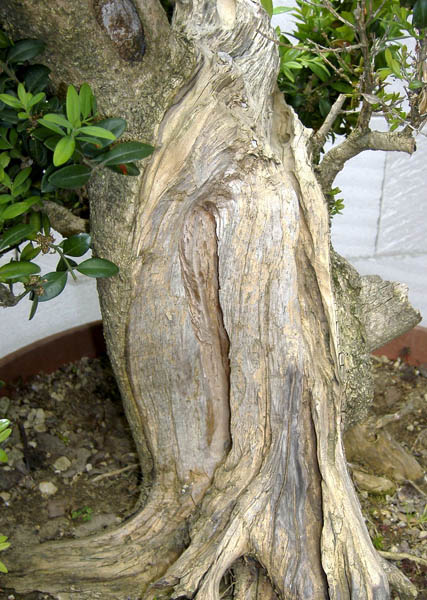
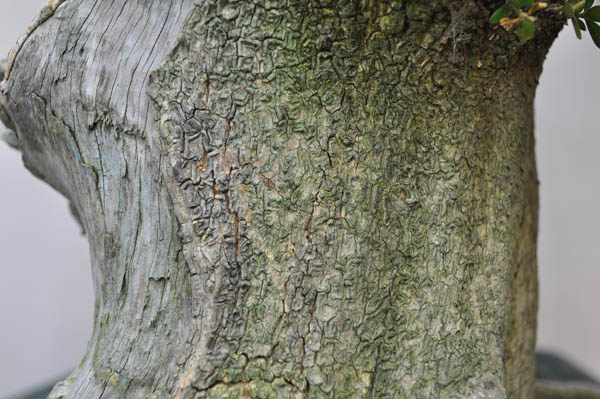
The eye must be trained to read the signs the wood shows. Small cracks are very relevant signs: a tiny fissure could be the exact point where the decomposition of the wood starts, as it is an access point for water, insects, air... this is where the beautiful ageing factors would show themselves ..and it will be from here the chisel shall begin its journey!
The use of manual tools, no matter how long it could take, allows you to continuously read these signals, while a milling machine may easily erase everything.
After years of careful cultivation, the time for re-potting also comes.
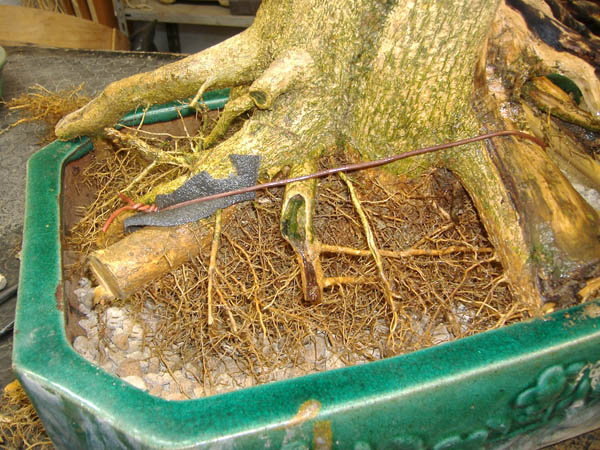
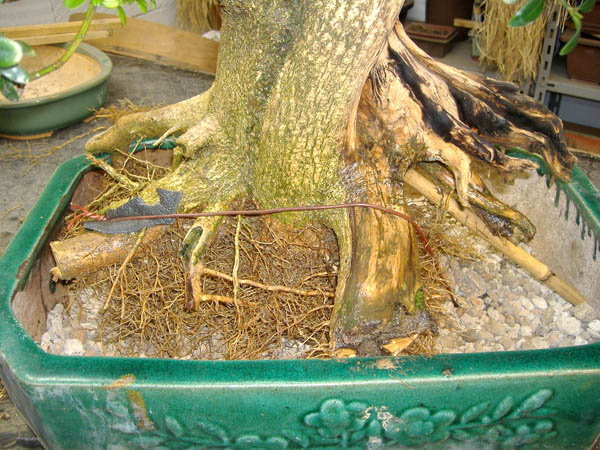
Here is the decisive moment, when you have to remove the old clod, that horrible clay that has now become not too different from concrete.
It's a resolute re-potting: I carefully remove all the soil with a stick and then give the roots a good rinsing!
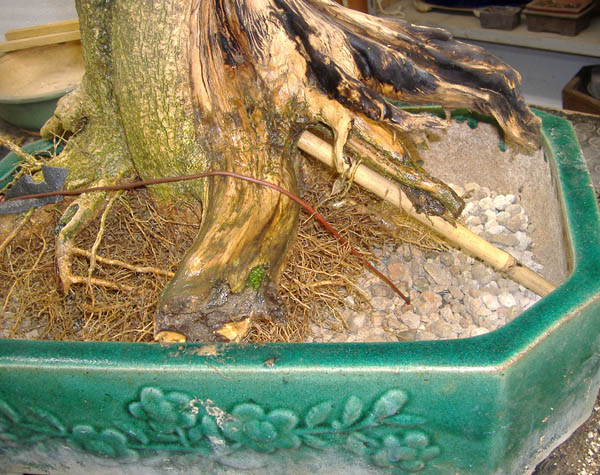
The boxwood is placed in a temporary pot. I take great care of its anchorage to the point of using an impromptu prop.
The plant is now properly stabilized. All we have to do is to place the soil: a mixture of about 70% pumice (even large grain size) and 30% soil. Both elements have been sieved so to get rid of the smallest particles.
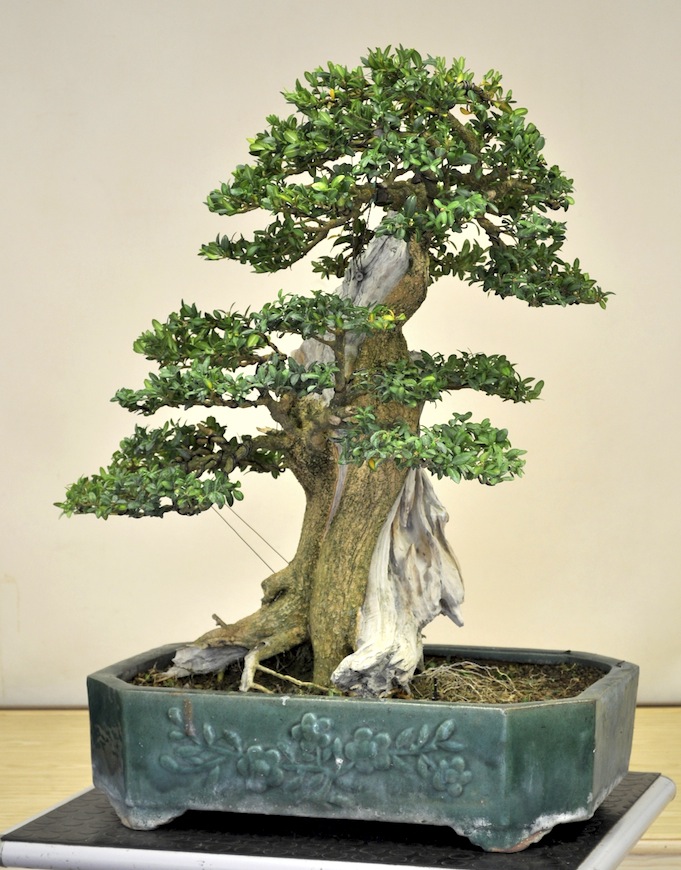
Over the years I have applied the wire several times in order to put in place and lower the primary branching. With pruning, instead, I can compact and thicken the branches. It is time now to assess the various shaping options.
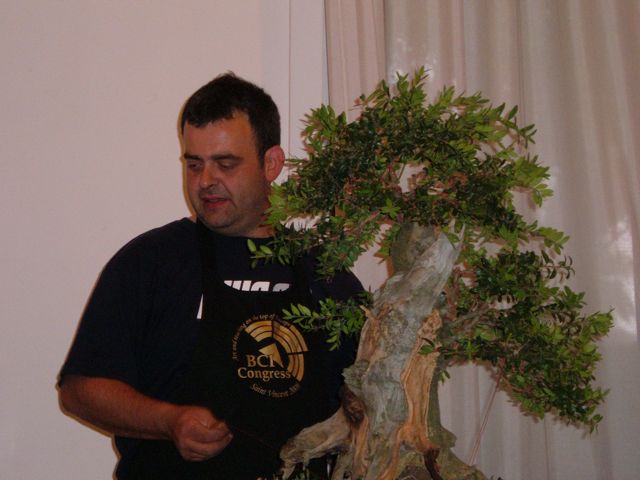
I demoed this work at Arco IBS 2010 Congress.
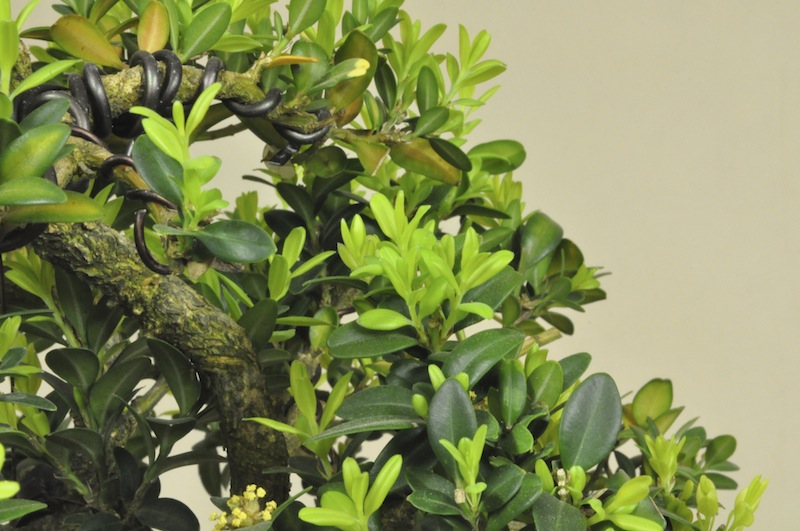
The work carried out was basically the selection and creation of orderly foliage pads. Given the season (May) I decided to intervene in a soft way, excluding pruning or demanding folds. No raffia then, assuming there was a need! Just a lot of wire so to style thoroughly the many branches.
The aim of shaping fully correspond to help the tree to build up a fairly tidy, beneficial, consistent and natural foliage at 360°.
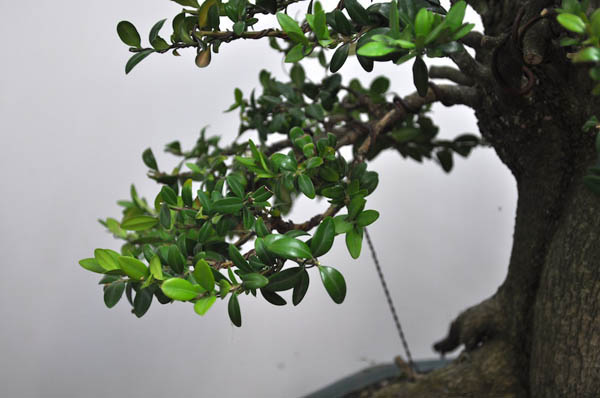
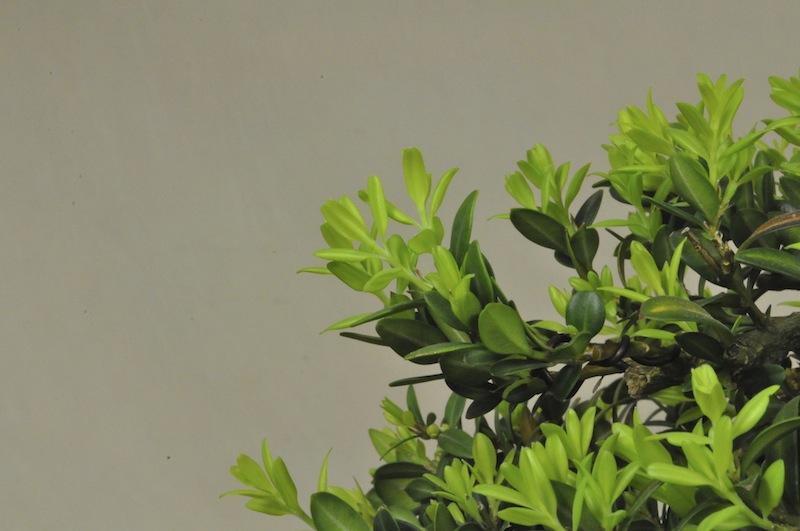
While wiring we must clearly be careful not to damage the buds. I suggest to tidy up the twig ramification in a similar fashion as for junipers: remove the vegetation at the base of the bifurcations, the leaves on the first part of all the twigs and so on.
This also helps wiring the branches. And let's not forget that in all trees the vegetation is only on the tips of the branches. It makes no sense to keep the leaves in the inner part.
When shaping the branches, especially medium-sized ones, you have to be very careful. Twisting during bending is an excellent way to reduce the risk of breakage. Do not bend excessively. It is much better to position the branches straight and in the light, without folding too tightly; at the very least, shorten them if they are too long.
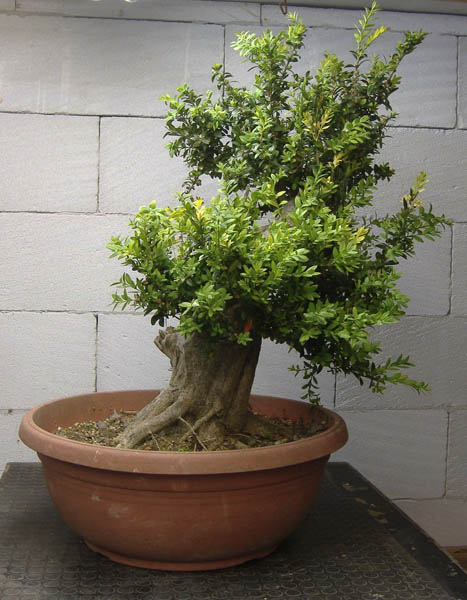
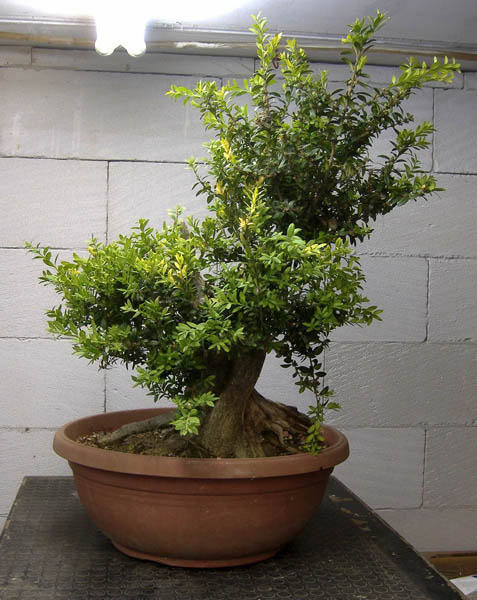
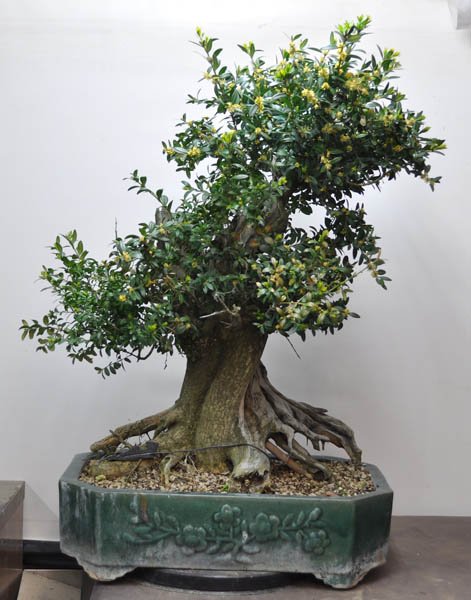
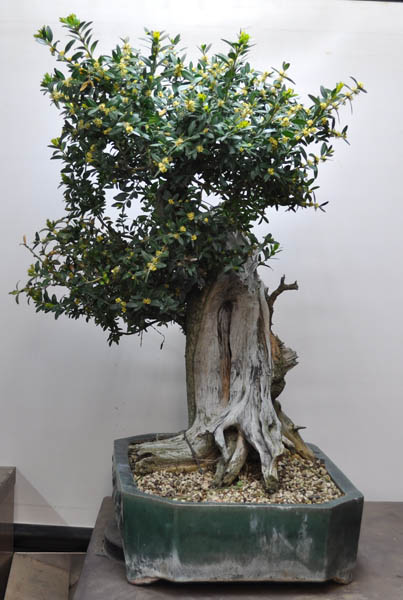
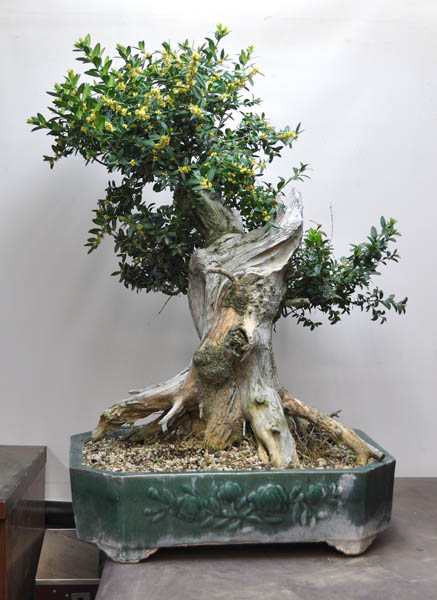
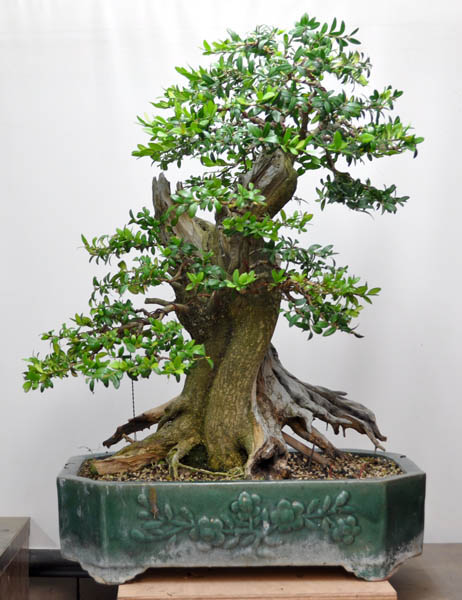
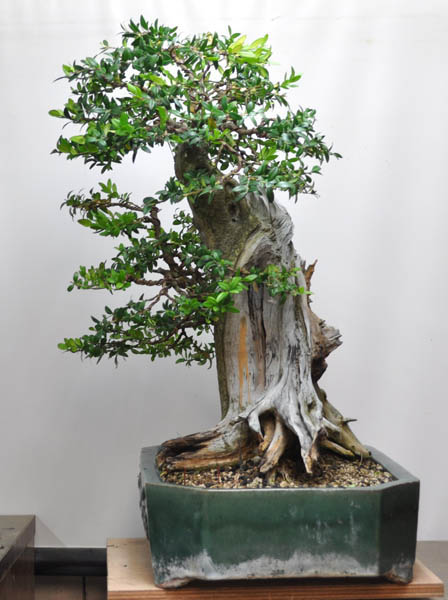
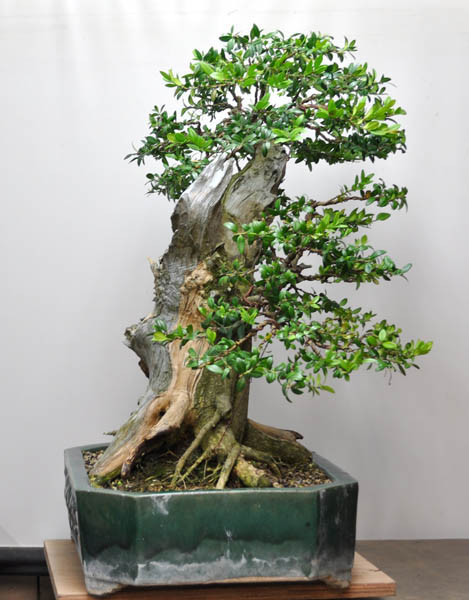
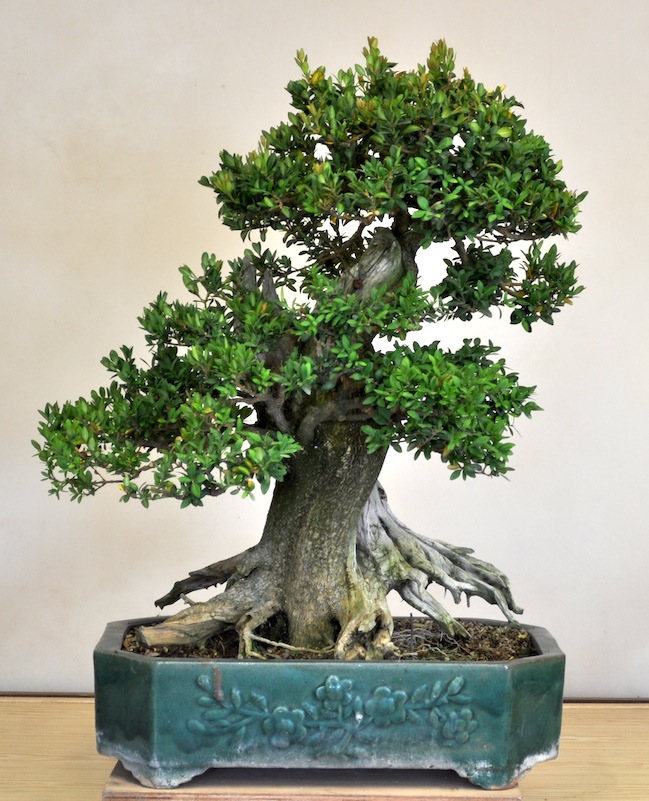
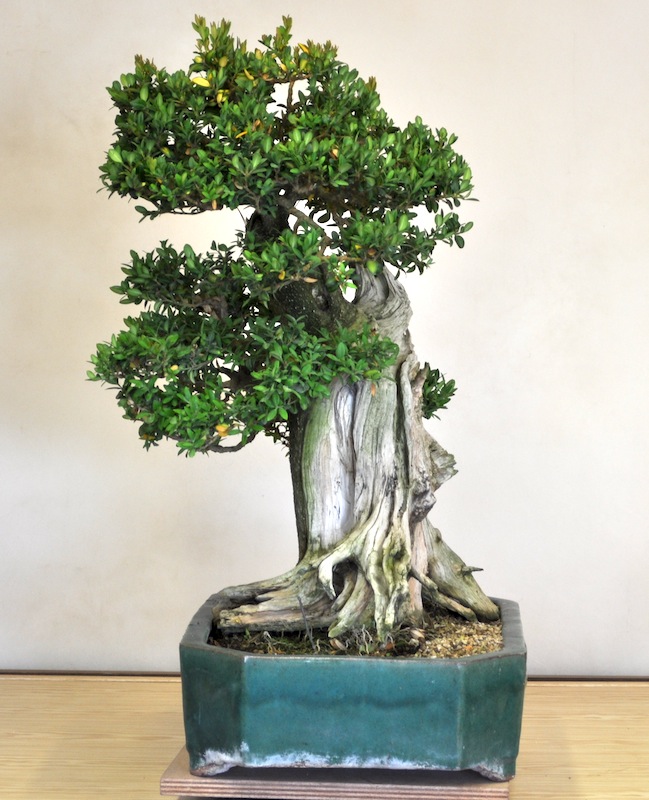
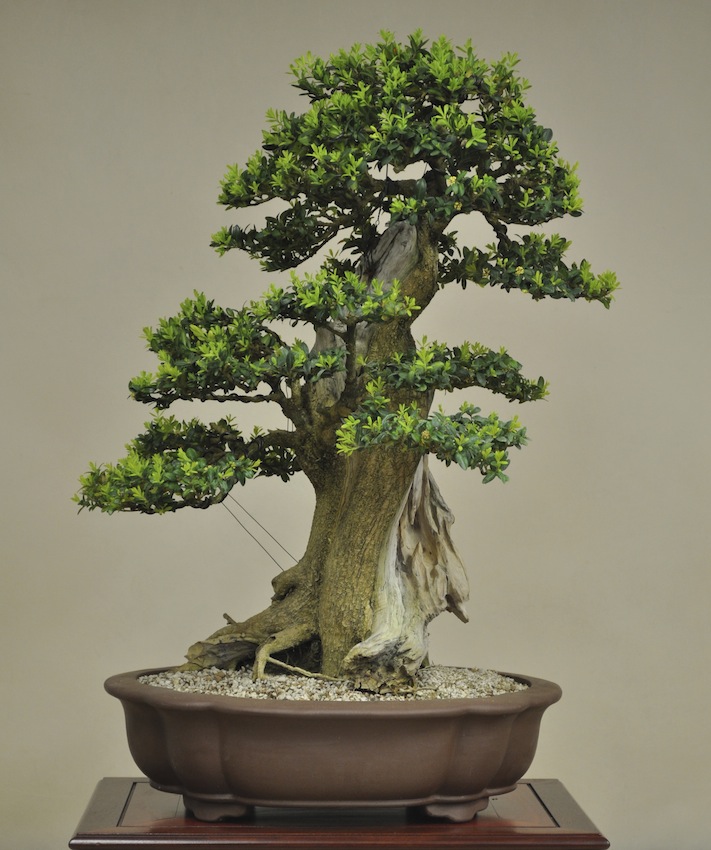
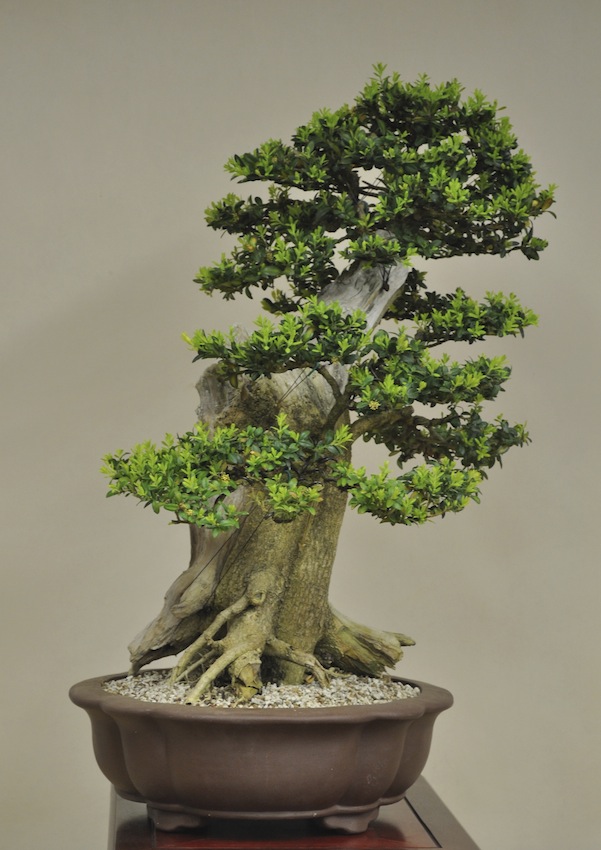
In the following years the plant has been re-potted and pruned in order thicken the foliage.
The last photos show boxwood in 2014.
Year 2001!!!!
I receive a phone call from a friend at 11.30 p.m.: "Francesco, a friend of mine is having his garden bulldozed. There are some big boxwoods, shall we go and have a look? We have to do it right now, or, tomorrow morning there will be nothing left!"
I guess my friend is indulging in hyperboles, nevertheless if in doubt, don’t! Made the car in seconds flat, made my way to the garden.
Sure enough, my friend was right. Before my eyes there is an incredible amount of boxwood logs, lots, lots, lots of boxwood!!!
Unfortunately, the excavator did its work pretty accurately and many of these logs were completely broken or with no roots.
Using a flashlight, we manage to find some boxwoods with roots.
The plants are big... old... and heavy!
We do what we can and hope for the best while re-potting ...At 4 a.m. we're done!!!! Our boxwoods are all in pots.
Among them, there was a heavyweight one ... here it is!!!! I called it the boxwood "chisel-slayer": you can figure it out why!!!!!
The first photos date back to 2003 when roots were already pretty well developed!
In the first stage of cultivation, my focus was on the swelling of the branches. Boxwood tends to make many buds concentrated in a few places. If you do not select the branches and twigs you will have young and herbaceous branches only. So, it is better to leave a few of them, well distributed along the trunk, and let the buds begin to swell and then lignify. Let them grow freely, cultivated in the sun and with a close eye on a proper, generous fertilization. The outcome is easily predictable.
Given the consistency of the boxwood, it would be better to prune young branches according to the design. I strongly recommend here to use anodized aluminium wire, wrapping the branches loosely. It will be especially useful to lower the initial section of the branch before it becomes too hard to bend!
The presence of the wire on the trunk did not allow me to work the wood. I had to wait until branches reach an adequate diameter, so that I can use the chisels!...and this is where the name of this plant comes from!!!
Boxwood, you know, is very hard and compact. It tends to be somewhat difficult to work with and it has a slight blunting effect on cutters, so the best way to split our chisels is to let them get into the wood with an hammer blow and then delude ourselves that we are leveraging them to lift the xylem cells or phloem sieve tube elements...huge mistake!!!
With boxwood you have to be extremely meticulous.
If, like me, you don't like working with an electric milling machine at all, the first step is to use a splitter. Once it gets into the wood, the latter is easily divided. Best not to overdo, so proceed cautiously, in small steps!
Once the volume of wood has been reduced, it is time to go deeper into it with chisels. The same basic rule, i.e. caution, applies here too.
The eye must be trained to read the signs the wood shows. Small cracks are very relevant signs: a tiny fissure could be the exact point where the decomposition of the wood starts, as it is an access point for water, insects, air... this is where the beautiful ageing factors would show themselves ..and it will be from here the chisel shall begin its journey!
The use of manual tools, no matter how long it could take, allows you to continuously read these signals, while a milling machine may easily erase everything.
After years of careful cultivation, the time for re-potting also comes.
Here is the decisive moment, when you have to remove the old clod, that horrible clay that has now become not too different from concrete.
It's a resolute re-potting: I carefully remove all the soil with a stick and then give the roots a good rinsing!
The boxwood is placed in a temporary pot. I take great care of its anchorage to the point of using an impromptu prop.
The plant is now properly stabilized. All we have to do is to place the soil: a mixture of about 70% pumice (even large grain size) and 30% soil. Both elements have been sieved so to get rid of the smallest particles.
Over the years I have applied the wire several times in order to put in place and lower the primary branching. With pruning, instead, I can compact and thicken the branches. It is time now to assess the various shaping options.
I demoed this work at Arco IBS 2010 Congress.
The work carried out was basically the selection and creation of orderly foliage pads. Given the season (May) I decided to intervene in a soft way, excluding pruning or demanding folds. No raffia then, assuming there was a need! Just a lot of wire so to style thoroughly the many branches.
The aim of shaping fully correspond to help the tree to build up a fairly tidy, beneficial, consistent and natural foliage at 360°.
While wiring we must clearly be careful not to damage the buds. I suggest to tidy up the twig ramification in a similar fashion as for junipers: remove the vegetation at the base of the bifurcations, the leaves on the first part of all the twigs and so on.
This also helps wiring the branches. And let's not forget that in all trees the vegetation is only on the tips of the branches. It makes no sense to keep the leaves in the inner part.
When shaping the branches, especially medium-sized ones, you have to be very careful. Twisting during bending is an excellent way to reduce the risk of breakage. Do not bend excessively. It is much better to position the branches straight and in the light, without folding too tightly; at the very least, shorten them if they are too long.
In the following years the plant has been re-potted and pruned in order thicken the foliage.
The last photos show boxwood in 2014.